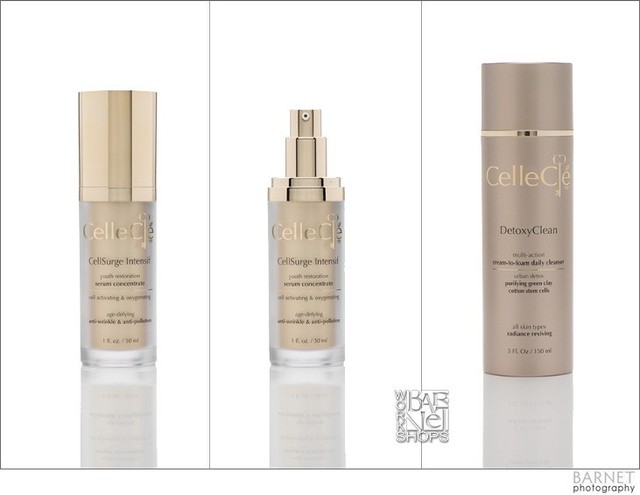
Besides fashion inspired portraits of the executives of this company, we were asked to photograph their new line of products. This gave us the opportunity to get in the studio and work with challenging but fun products, like the ones below. The Client wanted a realistic look and a consistent soft reflection below the products.
We photographed several types of products. The most challenging ones were the matte glass containers with highly reflective gold tops; capped and uncapped, and very reflective, wide, brand names. There are several ways to photograph this type of product. Sometimes the photographer will be asked to photograph “blank” containers, where some or all of the copy will be added in post. Sometimes matte spray can be used to minimize reflections, commercial clients often want their products photographed without any shadows or reflections, and sometimes, as in this case, we’re asked to photograph the actual finished product with a reflection instead of a shadow. Creating a shadow in post is much easier than a reflection, so if you want a reflection, it’s best to capture it that way to begin with if possible. Here, we used a sheet of very reflective, white plexiglass.
Below is the set we used for this shoot; with ongoing product photography for a specific Client, you want to be able to recreate the look for future assignments, so we photograph the process, and make notes. The background is a sheet of 1/8″ plexi, about 40″ wide, and 90″ long. Why that size? Because it’s the largest that would fit in our Ford Explorer. If you have the room to transport and store it, a larger sheet than you need can come in handy for larger items or product groupings in the future. 1/8″ inch is perfect, because it’s rigid enough to look perfectly flat, and flexible enough to “sweep” in the background as seen here. We placed it on a table, and clamped the top edge of the sweep to arms on "C" stands.
The large soft box on top is a Chimera Large (4'x6'), the smaller one in front is a Chimera Medium, and there is a Chimera Medium strip on each side. All are silver lined. We could have used smaller light modifiers, but if you have them, the larger boxes, used close up, help to keep unwanted reflections out. The light sources are Profoto 500 w D1 Air monoblocks (top and front) and the strips have Profoto B1 Air TTL monoblocks. The modeling lights are very helpful to visualize what the flash will do. One of the best features of the Profoto B1 and D1 heads is that they can be individually controlled very easily from the transmitter on the camera’s hot shoe. The large box is mainly lighting the background, overexposing it just enough for a clean white backgound. The top boxes are on Avenger mini booms on Mathews roller stands.
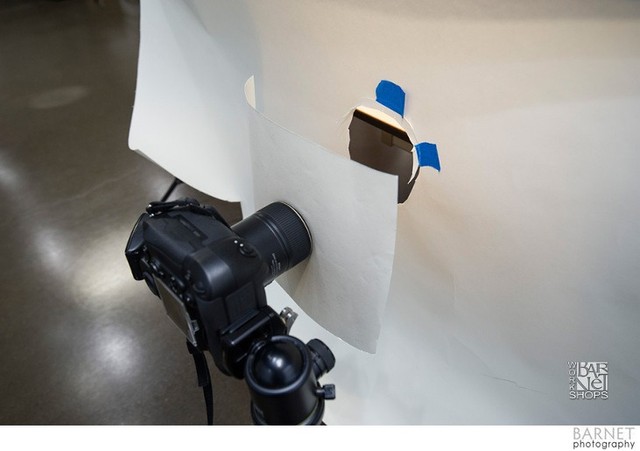
We used a Nikon D850 and a Nikkor 105mm macro at around f 22. The camera was mounted on a Gitzo tripod with an Arca Swiss ball head and a Really Right Stuff plate. This is an odd combination of tripod parts, but I like the features each of these components have, and can work very fast with it. As you can see below, to avoid reflections, we placed white paper in front of the camera, with a hole in it for the lens, and then put white paper on the lens itself (held in place by the lens hood). This is to minimize reflections on the highly reflective subject.
This is Mirta, placing reflectors (white mounting board held in position by clamps) around the subject. These help reflect light and minimize reflections. Sometimes we turn them around to the black side to act as “flags” if we need to withhold light or create a shadow.

Post production: Except for the non reflective items, the final images of each item delivered to the Client were composites of several images. With these highly reflective, round surfaces it’s almost impossible to capture one exposure with every part of the product looking perfect. Many exposures were made for a particular section of the product, at the expense of another part being blocked by a reflector, blown out or underexposed. Then, in post, these images were combined to create the final image. For some products, especially the tops, part or all of one side was reversed, and applied to the other side. The results were photographs that look realistic, with some reflections, as products like these look in real life, without the over manipulated look you can get from clipping and added shadows. Of course, if a totally clean look is needed, the reflections can be eliminated. There are many companies that specialize in product photography post production, often referred as “clipping”. These outsource vendors come in handy if you have lots of items to photograph, or don’t have the time or the Photoshop skills to do it yourself. The prices for these services are very reasonable. Of course, the better the image you start with, the better the end product.
This is what a day in the studio shooting product is like. Fun, but can also be frustrating. Sometimes it’s like solving a puzzle… What is creating that highlight or casting a shadow, and how can I fix it… What reflector or light do I move, etc. Not the best assignment to take on if you don’t have the time to do it right.