HEADSHOTS WITH CLAMSHELL LIGHTING
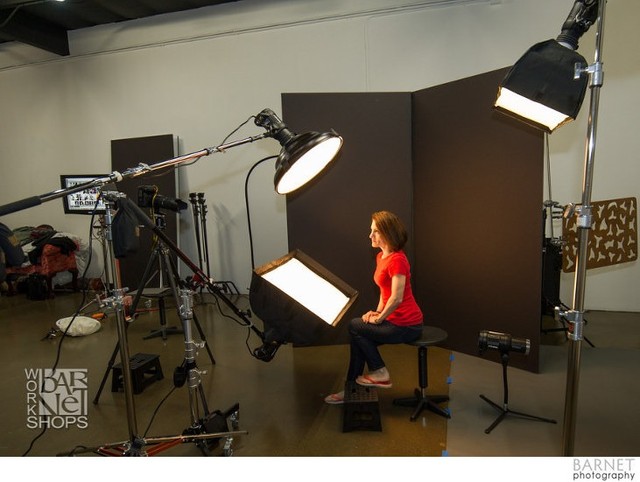
After the last workshop at our studio, Mirta and I played a little with “Clam Shell” lighting. This technique, usually associated with fashion head shots, produces beautiful results and is very simple to do. The name comes from the fact that you have a light source very close to the model, centered and aimed down, providing “Butterfly” or “Paramount” lighting. Then you have another light source (or a reflector) right underneath and centered, pointing up to reduce the shadows from the main light. Together, they act as the 2 shells of a clam.
The image of Mirta below, was created with 4 light sources, but in the foreground of this first image, to the right, you can see a square, Westcott silver reflector on a short stand that can be used instead of the soft box in the image, providing the fill light from below. The reflector works very well, but for it to be as efficient as possible, it has to be positioned very close to the model’s face. After all, it’s only reflecting light. The soft box, with it’s own light source, gives you more placement flexibility.
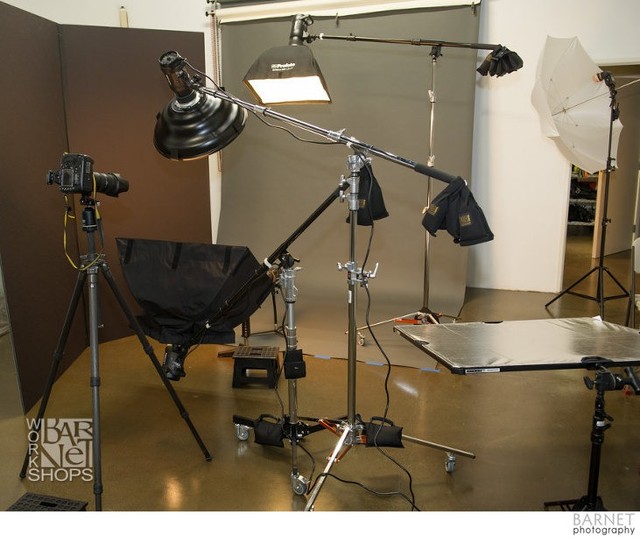
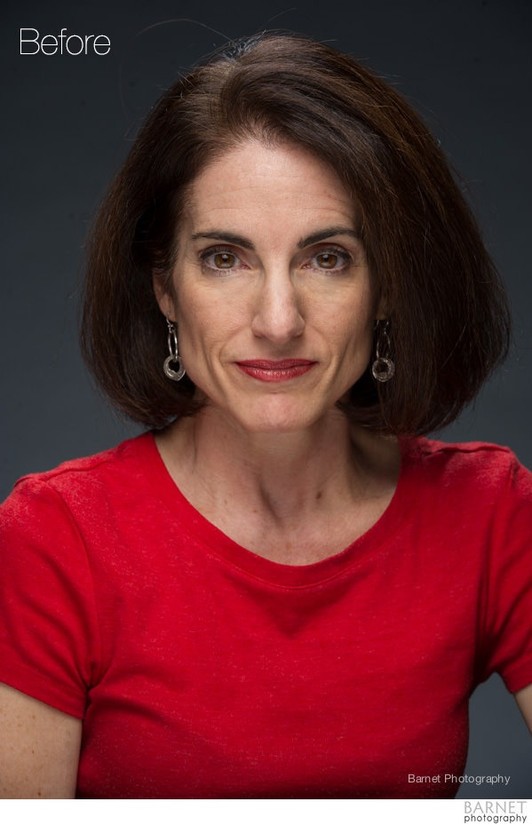
For this 4 light set up, the main modifier is a Mola Demi beauty dish, fitted with a white grid. The fill is a Chimera small soft box, the hair light is a small Profoto soft box, and the background light has no modifier. The main and fill are Profoto 500 w D1 mono lights and the hair and background lights are Profoto B1’s. We like the B1 heads for hair and background lights because not having cords on them makes it easy to move them around. The main and fill are mounted on roller stands with mini booms, the fill is on a short roller, also with a mini boom, and the background B1 is mounted on a background stand with a very short, flexible post. Because a good amount of counter weight is needed for these set ups, as you can see in the first image, roller stands make placing the lights exactly where you want them, and adjusting them, much easier than stands without wheels. The background paper is “Thunder Gray”, from Savage. My gray studio paper of choice, especially for head shots is “Fashion Gray”, but Thunder Gray happened to be what we were using earlier. We used a Nikon D5 with a 70-200 2.8 VRII lens and the Profoto Air remote.
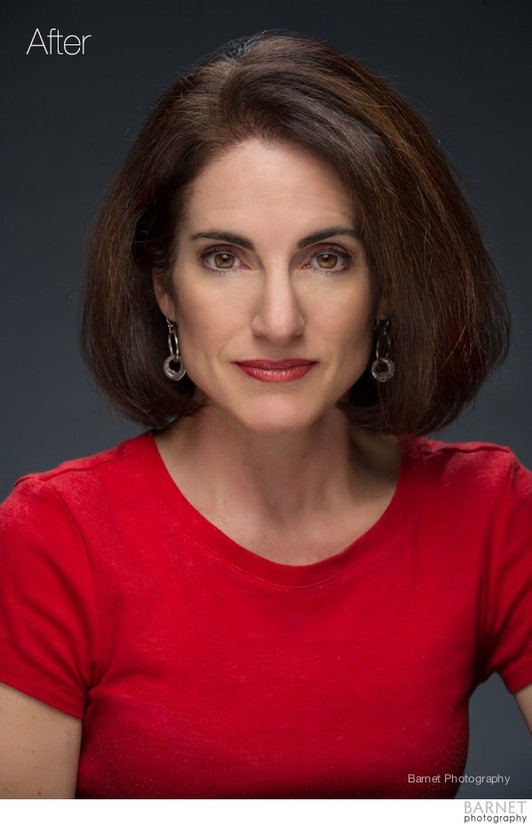
Below is one of our final images, color corrected in Lightroom only. In hind sight, I would have used more background light, especially with the dark Thunder Gray paper, and more hair light for Mirta’s dark hair, the model we had for our class had lighter hair. With this kind of image, I like to have the background lighter at the bottom, fading up, and using the hair light for separation.
The image below was retouched by Mirta. In this example, the majority of the retouching is in knowing where to dodge and burn the subject to minimize facial lines, open up the eyes, and smooth the skin. Mirta show how she does her retouching at our Digital Workflow workshops.
One great way to learn more about photography is to "dissect" images we see in magazines, books, etc. Not only the ones we like, but also the ones we don't like. When looking at headshots, we can get a good idea of the lighting used by looking for reflections of the lights in the eyes... In the image below you can clearly see the main light above and the bottom fill below. Some photographers eliminate or de-emphasize some tell tail eye reflections to create a more natural look.
There are exceptions of course, but in most instances, the best lighting, in my humble opinion, is when only one light source is obvious.