EDITORIAL STUDIO BRIDAL SHOOT
Bridal Magazine advertising and exposure are very important parts of our overall marketing plan. Most bridal magazines favor their advertisers when it comes to weddings featured and decor and bridal shoots, as it should be, in my opinion. You have to submit the “right” weddings to the “right” magazine when it comes to having your weddings published and, you have to have the experience, resources and availability if you want to shoot for bridal publications. These assignments are not paid. In fact, you’re competing with all the other photographers who advertise, for the privilege to do these shoots. The payback is more exposure, (besides your ad) great website and portfolio images, relationships with models and bridal stores, and very important, establishing, or reinforcing, relationships with the venues where these shoots take place, if not in studio.
The year before this shoot in our studio we photographed this magazine's bridal fashion spread at the Biltmore Resort in Newport Beach, CA, also featured here. Here are a few of our favorite images and behind the scenes photos:
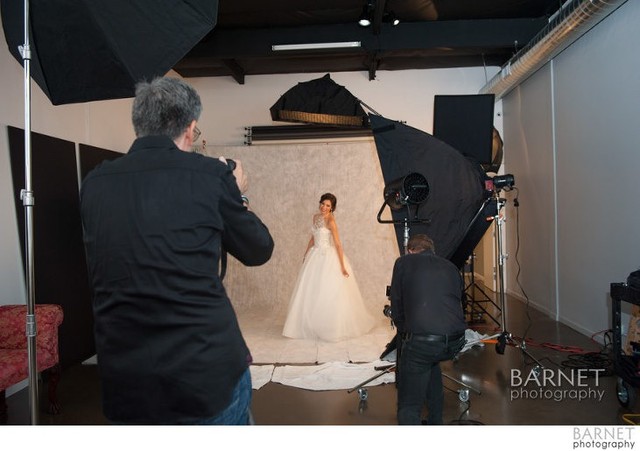
One of the biggest challenges with these shoots is the number of gowns to be featured. We normally work with at least two models so that while we’re photographing one, the other one is changing their makeup, hair, and gown. This is why a studio shoot can go faster than a location one where you travel from spot to spot for background variety and the models also have to travel to the changing and makeup area...
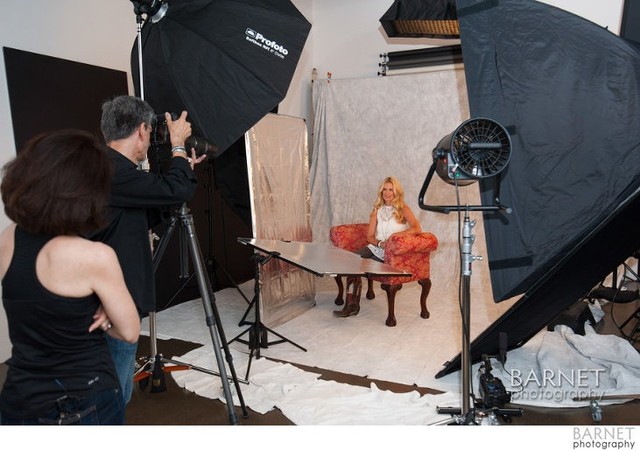
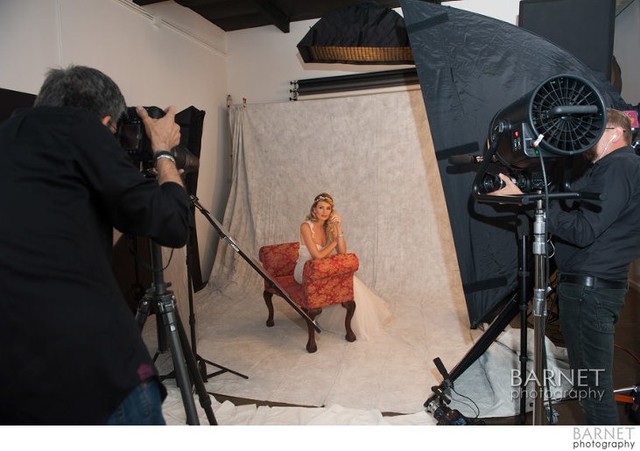
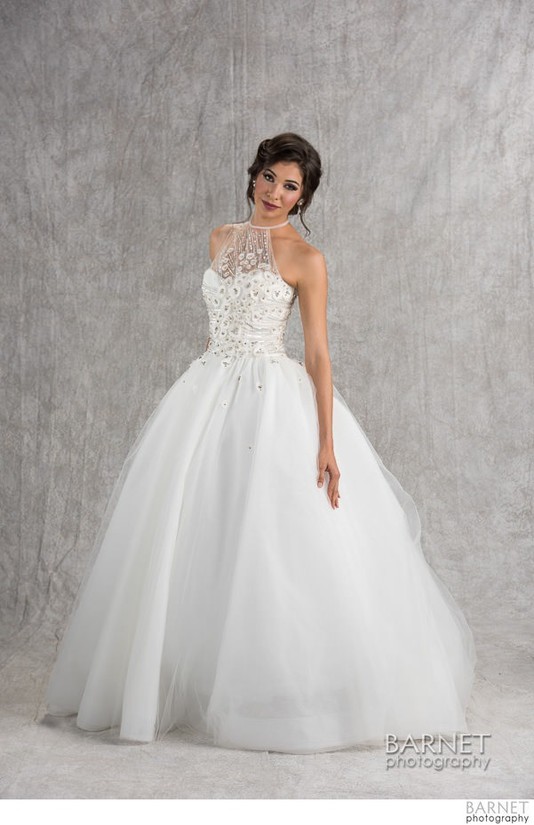
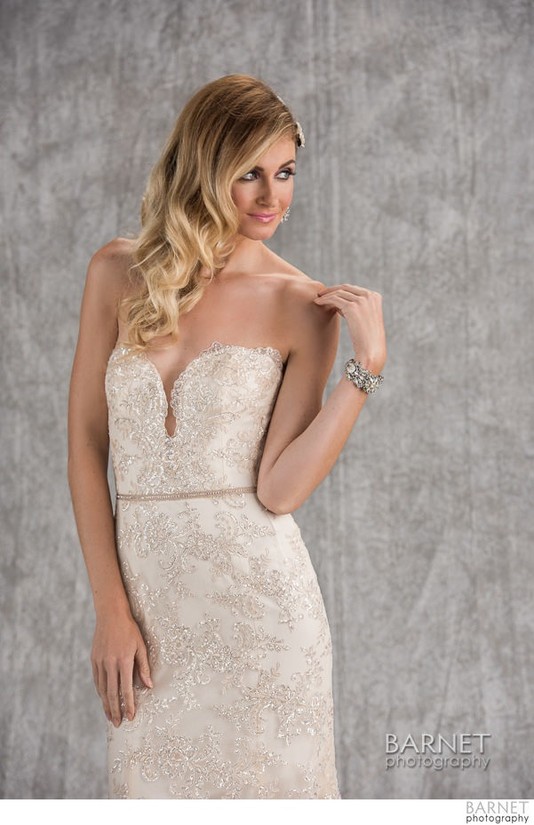
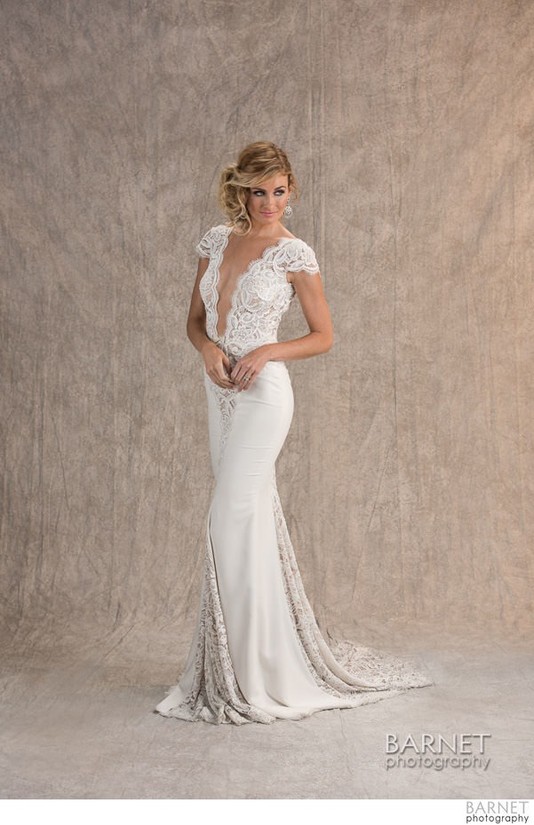
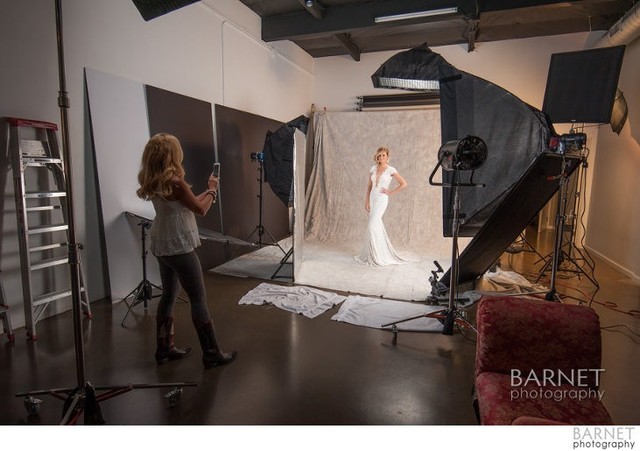
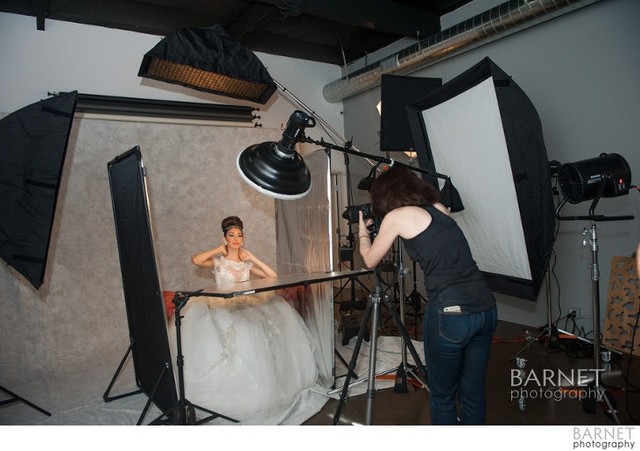
Above is the final image of the set up below. Cross lighting the fabric is important to show texture, especially with an intricate gown like this one. And, the model’s face is turned into the light. The main or key light to the right is a 6’x4' Chimera box with a Profoto D1. To the left is a Chimera medium strip with egg crate, with a Profoto B1. The hair or separation light is another Chimera medium strip with egg crate on a boom. The light source is a Dynalite head on a 1000 pack. This was a 3 light set up. To the right is a studio fan on a Mathews roller. These fans are great, they provide a very concentrated, variable air stream. To the left, against the wall, are “V” flats, black on one side and white on the other. These are used to reflect or absorve the light bouncing back to the subject. To provide a sense of perspective, the ceiling is 14′ high and the muslin background is 20' wide.
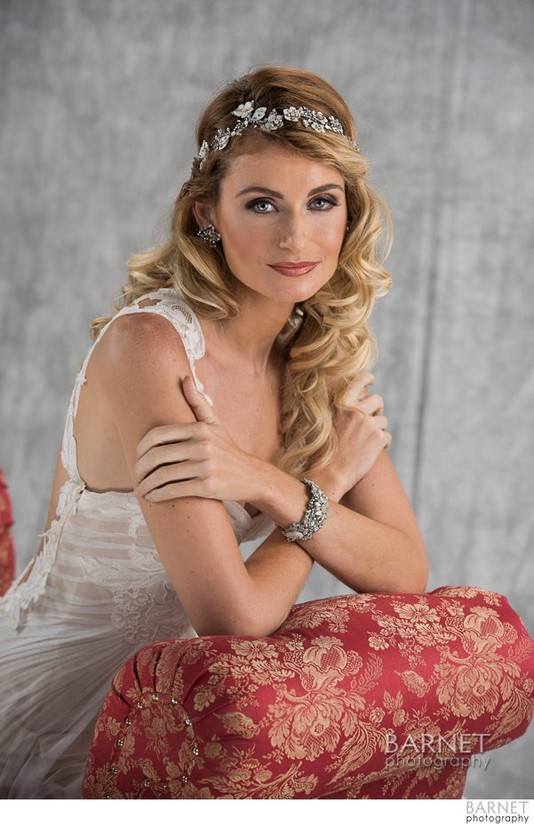
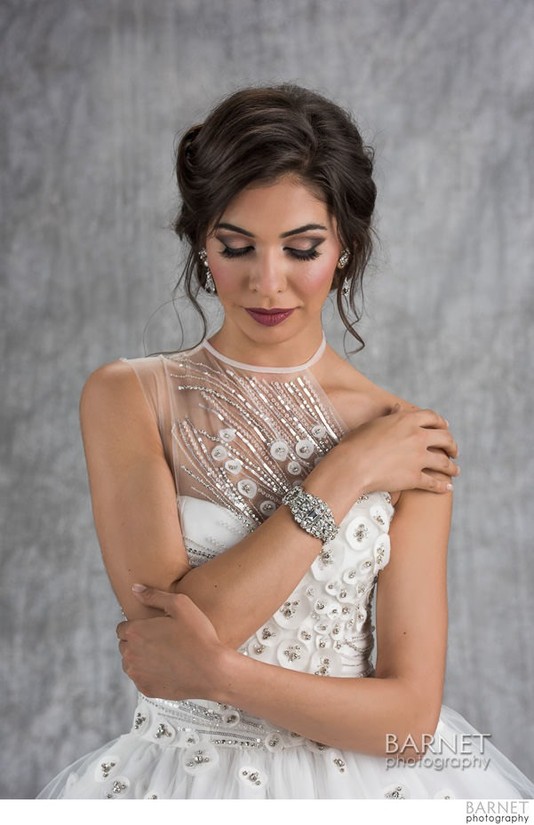
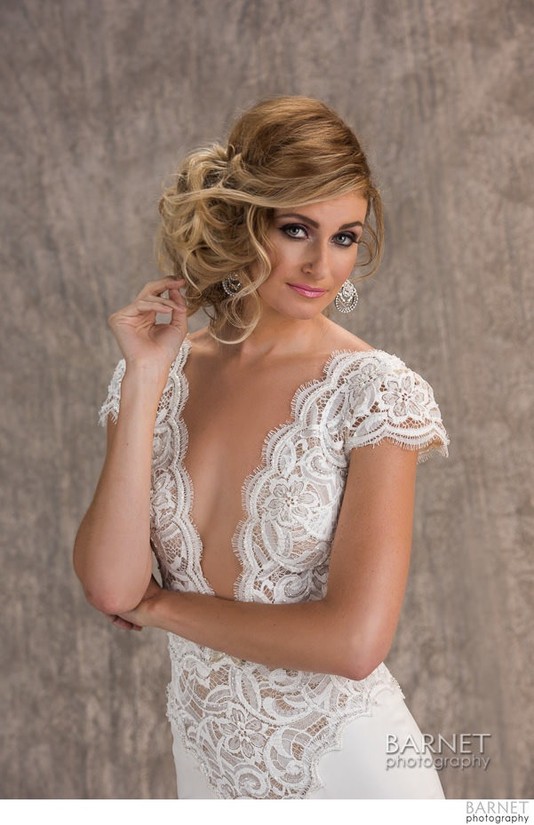
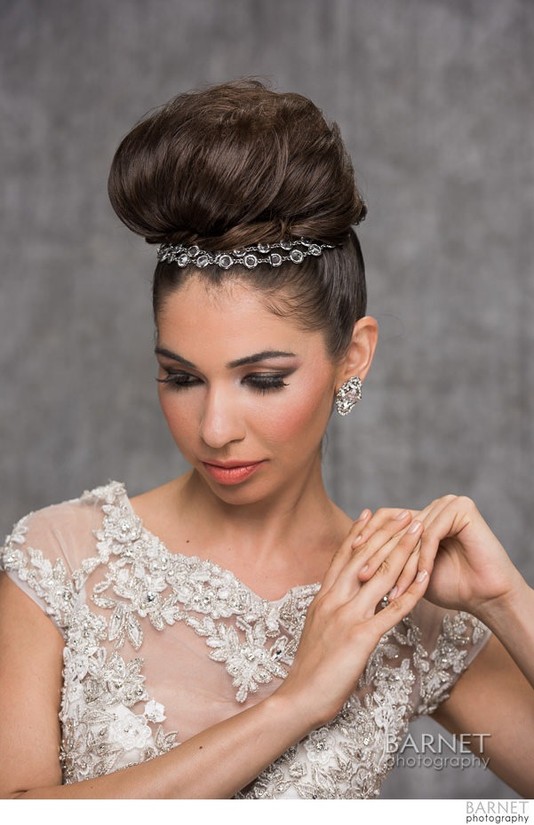
The photo above highlights the jewelry , hair style and makeup.
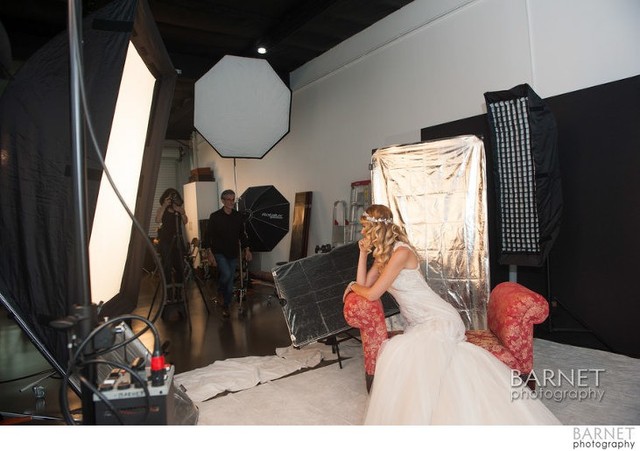
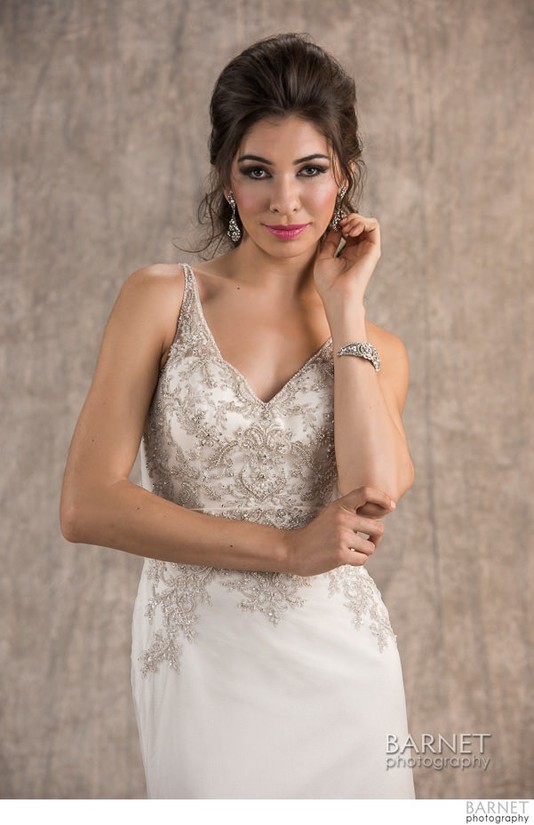
These 2 images above and below show the set up for the close ups. The same basic lighting, with the introduction of 2 silver reflectors, a 6×4 to camera left and a 3×3 to bounce light back to the face, from below, from the main light. The strip to camera left is still being used.
Below is our makeup area in the back of the studio, Design Visage provided the great makeup and hair. To the left is our changing area. It’s basically 3 6×4 translucent panels clipped together, this allows us to configure the studio anyway we need to. The modeling light from a soft box was used for makeup lighting.
Here is a video, produced by John Goolsby of Godfather Films with highlights from this fun shoot:
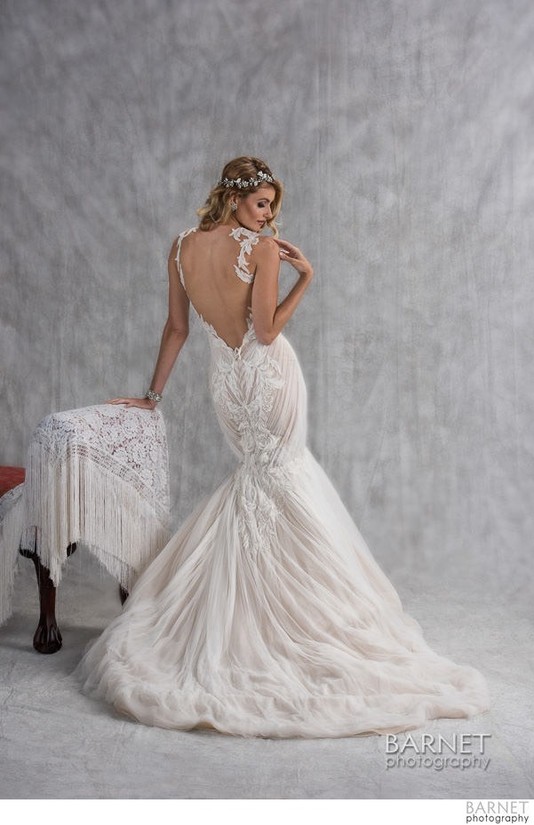
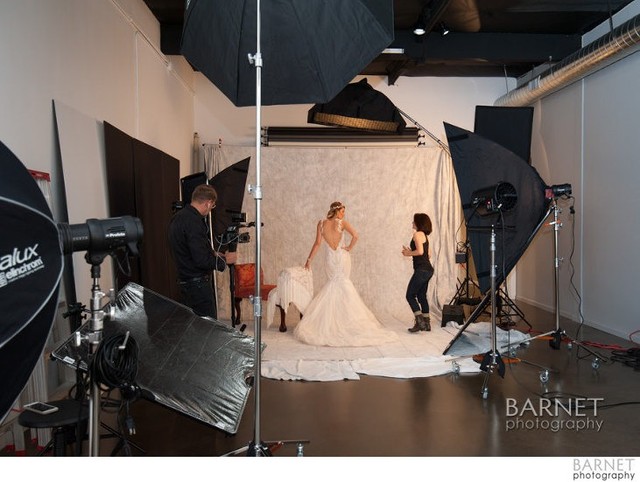
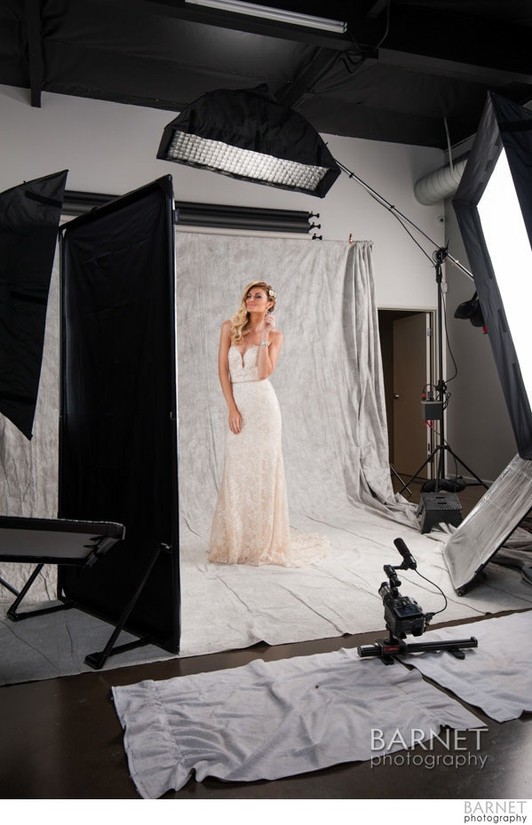
Above and below, close up and full length of the same gown with the same exact lighting. When we have to photograph many gowns in a short amount of time, it’s important to use lighting that is versatile and does not need to be adjusted often. A large 6×4 soft box doesn’t have to be very close to the subject to provide nice soft light with diffused transitions. The 5′ octa fill light was firing on these, but with minimum power. That’s one of the great things about the Profoto D1s and B1s, they can be dialed down considerably.
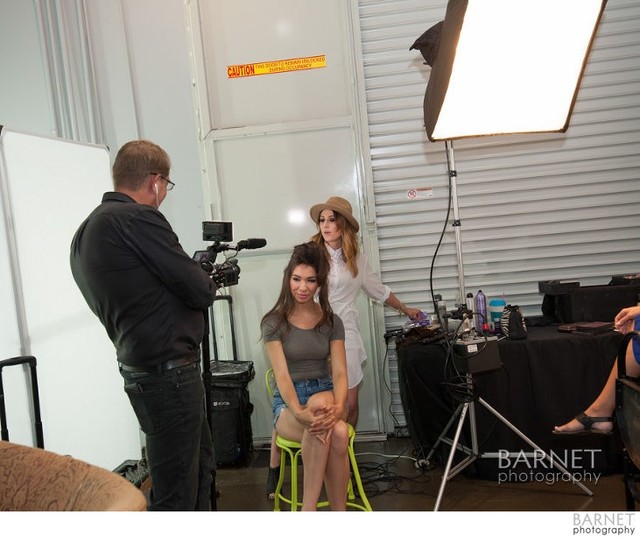
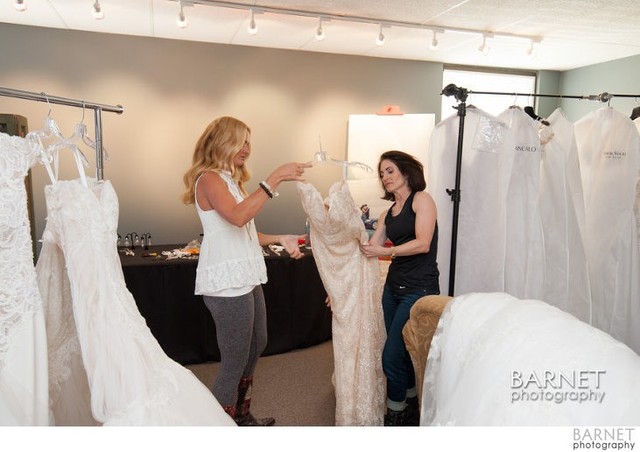
Below is our studio lobby with only a fraction of the gowns we photographed that day. Here, Amy and Mirta select the next gown to be used, in the photos below. The jewelry to be photographed with each gown is on the table in the background.
Lots of fill from the 6×4 silver panel on the left side. The small panel on the right below the soft box is kicking a little light up to avoid hard shadows under the chin and helped open up the eyes. The camera on the slider is John’s video camera.
Same exact lighting above and below. The large soft box to the right gives us a very soft shadow from the arm with direction, and a smooth transition. The “hair” light above helps put little shine and separation on the hair, especially with dark hair. We normally increase the power of the hair light for subjects with dark hair. This is where the egg crate helps focus and control the light.
In the image below, the umbrella to the left with a Dynalite head on an 800 watt pack was used in some of the images to open up the background and minimize shadows. You can see a black “flag” keeping the light from the umbral from spilling on to the subject. We used the black side of the V flats to control the fill coming back from the white wall. Soft light is nice, but without direction it’s too flat.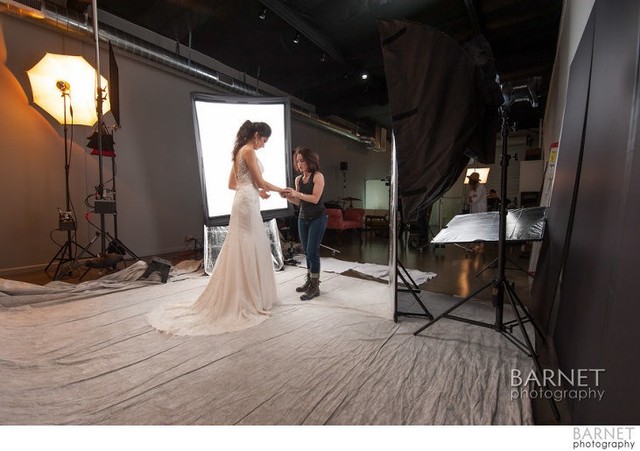
Above… Quick instagram pic. The modeling lights from the flash heads, that mimic what the actual light from the flash will do, are great for phone pics! You can get a better view here, in the back to the right, of the flag keeping the light from the background umbrella from spilling forward.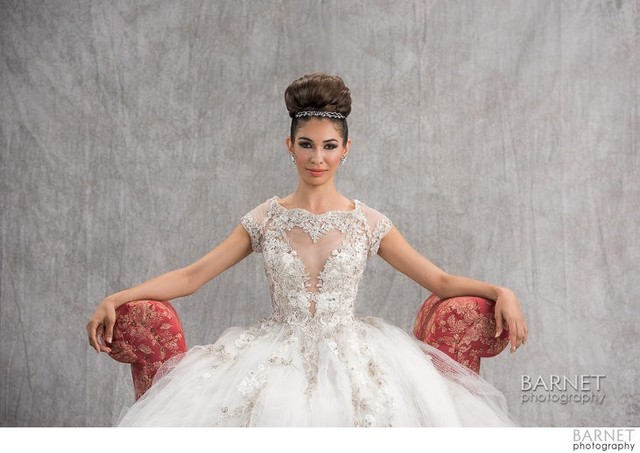
Above, pretty much the same setup as we’ve been using. Below, a very different, beauty dish set up. Notice that at pretty much the same f stop, the background is much softer (out of focus) because we’re focusing much closer. The closer you get to your subject, the more out of focus the background will be rendered, at the same f. stop. Same with the lighting. The exposure on the subject is the same, but the light source (beauty dish) being closer, will render the background darker. Meet “the inverse square law”. You have to learn a little physics to fully understand lighting… Who knew…
Below is the set up for the image above. Mola Demi beauty dish with a sock on a Profoto B1, coming straight down on the subject. This is called Butterfly lighting because when the subject is looking straight ahead, it creates a shadow that looks like a butterfly under the nose. It’s also called Paramount lighting because it was used (with hot continuous lights), in the Paramount motion picture studios to photograph the movie stars press release photos. When you add a silver reflector below, or another light source, it becomes “clam shell lighting”. That’s what we have here.

For the photo above of “the Boss”, Amy, the magazine's publisher, I used a 3 light and 2 reflector set up. The 4×6 Chimera on the right, the 5′Profoto Octa as a fill, brought in close, a strip with egg crate for a hair light, a 3×3 silver reflector underneath bouncing the main, and the fill lights back under the chin, and a 4×6 silver reflector on the left to open up that side, but still keep it a little darker than the right.